Monday, August 23, 2010

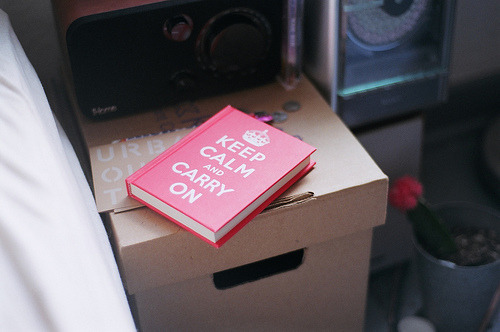
Keep Calm and Carry On


I'm always seeing this phrase all over the internet - on posters, books, t-shirts. But I never knew what the story was behind it. It was only when I stumbled across this website that I found out. This is going to be a bit text heavy, but I urge you to persist, it's just so interesting if you're a bit history obsessed like me!

Turns out that it's actually related to World War II. The Ministry of Information was formed by the British government in WWII, and was the department responsible for publicity and propaganda. After the outbreak of the war, the Ministry of Information produced a number of posters that were designed to boost morale. The first two posters featured King George VI's crown and featured the phrases 'Your Courage, Your Cheerfulness, Your Resolution will Bring Us Victory' and 'Freedom is in Peril'. They were displayed all over Britain.

'Keep Calm and Carry On' was the third poster, and it was planned to be put up once Germany invaded Britain. Since this didn't happen, it was never displayed publically. All the 'Keep Calm and Carry On' posters were believed to be destroyed at the end of the war, but 60 years later a bookseller discovered a poster in a pile of old books (I love when things like this happen!) he'd purchased from an auction. There are also a few displayed in British museums. And since copyright on works created by the British government expires after 50 years, the poster is has been reprinted and inspired all sorts of products.

I think I'm going to have to buy a poster now, cause of the history behind it as well as the fact that I really like the phrase. Have a look over here, it's a site that sells all sorts of Keep Calm and Carry on products, t-shirts, books, posters...even chocolate bars. It sells pretty much everything actually :).


Monday, August 2, 2010

Very nearly sixteen.


It's my birthday quite soon, on the 5th of August. I'm just starting to get excited. I love birthdays, just everything about them :). And of course, you can't have a birthday without a wishlist:

• Matt Smith as Doctor Who poster
• Leather satchel
• Cuckoo clock
• Map of the world (has anyone else noticed how good they look on walls? It's also to motivate me to get to the places I want to go to once I've finished school)
• A good book or two
• Vintage camera to add to my very small collection of three
• Typewriter
• More pretty tights
• Matt Smith to jump out of one of those huge novelty cakes
•Doctor Who + Harry Potter DVDs wouldn’t go astray either...

Wednesday, July 28, 2010

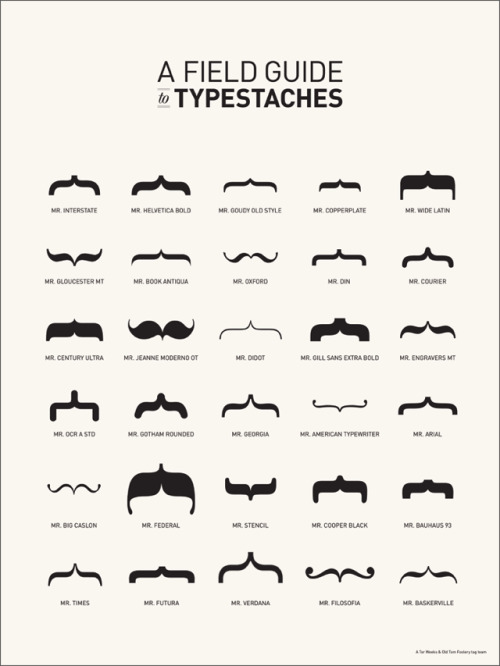
A Field Guide to Typestaches


So I'm pretty sure I need this print! You can buy it over here.

Sunday, July 25, 2010

My Birthday Wish


I love birthdays. Everyone is always happy. I love choosing or making presents and wrapping them just as much as I like receiving them, maybe even more.
What's your favourite thing about birthdays?

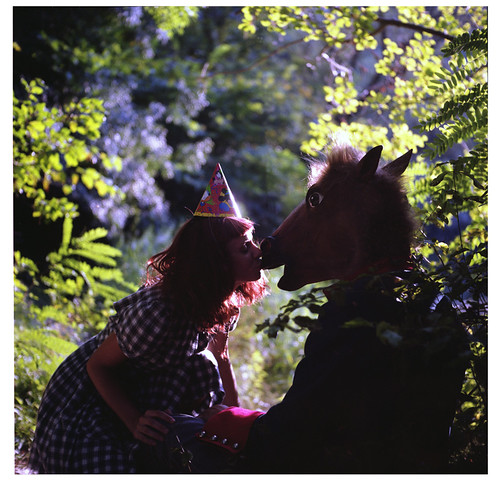
Lovely photos by Mario Leko.

Sunday, July 18, 2010

Bedroom Prettiness


The incredidbly pretty bedroom of Jessica. I never ever tire of looking at photos of bedrooms.

Sunday, July 11, 2010

Rainbow Cake


I've been wanting to attempt this cake for a while now, and my friend's birthday was yesterday, so...I made her a cake :). I was a bit worried about how it was going to turn out, since I'm not exactly known for my baking skills, but it actually looked and tasted pretty good!

If you have time you should definitely try it out, cause the end result is pretty cool!

Here's the recipe I used, which I found along with the video over at Whisk - Kid. Things in italics are what I've written.

White Cake
2 sticks (226 g) butter, room temp
2 1/3 cups sugar
5 egg whites, room temp
2 tsp vanilla
3 cups flour
4 tsp baking powder
½ tsp salt
1 1/2 cups (355 g) milk, warmed for 30 sec in microwave to bring to room temp
Red, orange, yellow, green, blue and purple GEL food coloring. Liquid will not be vibrant enough! I actually just used normal liquid food colouring, and it still turned out really well, so don't fret if you don't have gel food colouring.

Preheat the oven to 350F degrees. Oil and line how ever many 9” cake pans you have (I have three and I just reused them).

Sift together the flour, baking powder and salt. Set aside.

Cream the sugar and butter, then add the egg whites (I cracked them all into one bowl) and add them a little at a time. Add the vanilla and mix until fully incorporated. Then, alternating between wet and dry, add the milk and flour mixture in two parts.

Divide the batter amongst 6 bowls (I did it by weight. Weigh your mixing bowl before you begin adding ingredients and then subtract the weight of the bowl from the final measurement after the batter is completed. Divide that number by six and add that weight of batter to each bowl), and then whisk a fair amount of the appropriate food color into each bowl. Pour into the pans and bake for 15 minutes each.

When you remove them from the oven, let them rest on the cooling rack, in the pan, for ten minutes. Then flip, cover, and stash them in the fridge to cool quickly.

Lemony Swiss Meringue Buttercream
You're meant to use this to fill the spaces between each of the six cakes and to frost with. I didn't use it at all though, I just 'stuck' the cakes together using whipped cream, and frosted with ordinary icing. Still, I thought you might like to try it :).
I made this recipe twice today because I underestimated the amount of buttercream I would need/ I would recommend that you do the same because you would need a HUGE bowl to make this much buttercream at one time!

To fill and crumb coat:
9 egg whites
1 ¾ c (350 g) sugar
4 sticks (532 g) of butter, room temp
2 tsp lemon extract

To frost:
5 egg whites
1 c (200 g) sugar
2 sticks (226 g) butter, room temp
1 tsp lemon extract

Cook the egg whites and sugar in a small saucepan over medium heat, whisking constantly, until the sugar is completely dissolved (test by rubbing some between your fingers. If it's completely smooth, it's done). Pour into another bowl (a stand mixer is preferable) and whip on high speed until room temp. Then, on a medium-slow speed, add the butter, waiting until each piece is completely incorporated before adding the next. After all the butter has been added, turn the mixer back to high speed and whip until it has come together, about five minutes. Add the extract, beat briefly and then use.

If the buttercream seems soupy after all of the butter is added and does not come together after whipping, refrigerate for 5 to 7 minutes and continue whipping until it becomes fluffy and workable.


This video is kinda like a very quick how to..

Monday, July 5, 2010

Another Day, Cloudy Memory


A couple of weeks ago my Mum and sister spent the day in one of those little historic towns, and they brought me back this lovely diary :). Just as well as the one I'm using at the moment is about to run out. I love it, looks like an old book don't you think?

Sorry about my dodgy photos. Last two by me and first via here.

Followers

Views

 
Related Posts with Thumbnails

Ducks Like Tea Copyright 2009 Shoppaholic Designed by Ipietoon Image by Tadpole's Notez and edited by Kaytee at Ducks Like Tea. Header image by este pequeño corazón.